New to Diamond Painting? Have no fear! You're in the exact right place. And we're SO glad to have you!
WHAT IS DIAMOND PAINTING?
Diamond Painting is a new craft hobby that's a mix between Paint By Numbers and Cross Stitch. With Diamond Painting, you apply thousands of tiny resin "diamonds" to a coded adhesive canvas to create shimmering Diamond Art.
Diamond Painting was introduced to North America and Europe by the handdeals company in 2017. Since then, millions of crafters around the world have discovered the joy and stress-relieving benefits of Diamond Painting.
HOW TO START YOUR FIRST DIAMOND PAINTING

STEP-BY-STEP DIAMOND PAINTING INSTRUCTIONS
STEP 1: REMOVE ALL ITEMS FROM THE PACKAGE.
Each Diamond Painting Kit comes with everything you need to get started. Take stock of your canvas, set of diamonds, toolkit, wax pad, and tweezers.

STEP 2: LAY YOUR CANVAS OUT ON A CLEAN FLAT SURFACE OR WORKSTATION.
Roll your canvas out on a perfectly smooth and flat surface. Kitchen and dining room tables work wonders. Advanced Diamond Painters head over to Amazon and search for crafting tables.

STEP 3: SELECT A COLOR OR SYMBOL AND POUR DIAMONDS INTO THE TRAY.
Determine which section of your Diamond Painting canvas you want to start painting. Select the appropriate diamonds and pour a small amount into the grooved tray. Shake lightly so that diamonds shift upright.

STEP 4: APPLY WAX TO THE TIP OF YOUR DIAMOND PEN.
Peel back the plastic film on the pink wax pads and apply a small amount of wax to the tip of your Diamond Pen. The wax acts combines with the static cling and acts almost like a Diamond magnet.

STEP 5: PLACE EACH DIAMOND IN ITS CORRESPONDING SQUARE ON THE CANVAS
Each color diamond corresponds to a specific symbol or character on the canvas. Check the legend on the side of the canvas to figure out which symbol corresponds to each color. Colors are denoted using DMC threads. Peel back the protective film covering in small sections and begin painting. DO NOT REMOVE THIS PLASTIC FILM ALL AT ONCE.

STEP 6: REPEAT THE PROCESS UNTIL YOU HAVE SHIMMERING DIAMOND ART!
Work your way across the canvas diamond by diamond until you have a gorgeous DIY Diamond Painting! To increase the longevity of your Diamond Painting, consider sealing it before you put it on display! Diamond Paintings were meant to be enjoyed from afar - take a step back and marvel at the beauty.

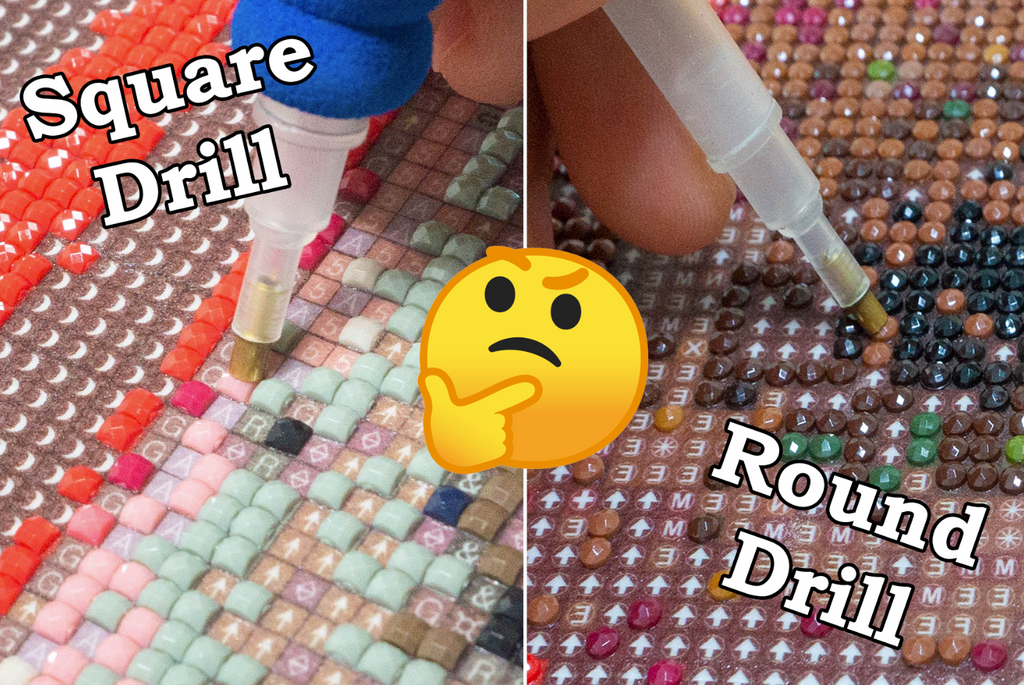
WHAT'S THE DIFFERENCE BETWEEN ROUND AND SQUARE DIAMONDS?

In Diamond Painting, you will often come across the terms "Square Drill" and "Round Drill." In Diamond Painting, a "drill" is simply another word for "diamond." So when we consider Round vs. Square Drill, we're referring to the physical shape of the diamonds.
In choosing between Square and Round Drills, it's important to know that there are no right answers. Each has its pros and cons. Your goal should be to choose whichever shape that you think yields the most beautiful result with the most satisfying process.
SQUARE DRILL (AKA SQUARE DIAMONDS)

Square Drill diamonds look a bit "cleaner" than Round Drill diamonds. They line up more easily and create a "fuller" mosaic look when enjoyed from a distance. The more diamonds you place, the cleaner the rows become.
Square Diamonds Satisfyingly "Snap" Into Place.
Sometimes it's the little things that matter! When you start making progress on a Diamond Painting and begin filling in gaps, you get a satisfying "snap" as the diamonds settle snugly into place.
ROUND DRILL (AKA ROUND DIAMONDS)

Easier (And Faster!) To Pick Up And Apply Diamonds.
Finished Painting Feels Less "Complete."
Given the round shape of the diamonds, gaps between diamonds may appear more apparent when you're close up with the painting. It's strongly recommended to view your Diamond Painting from afar!
DIAMOND PAINTING POPULAR TECHNIQUES
After placing thousands of diamonds, you may want to switch things up. The fine folks in the handdeals have developed a number of different Diamond Painting Techniques and strategies that everyone can follow!
THE CHECKERBOARD TECHNIQUE

Imagine the alternating black and white squares on a traditional checkerboard. Apply the same method to your Diamond Painting to mix things up a bit on areas with large amounts of the same color. The real upside comes when you fill in the gaps - SO satisfying when everything snaps into place.
"ROW BY ROW" METHOD

If you have a large block on your canvas with the same color, flip your pen upside-down and get working with your Multi-Placer tool! Using the wider head, apply 3 or 5 diamonds at a time and go quickly Row By Row. This method ensures your diamonds line up easily.
"COLOR BY COLOR" METHOD

This one doesn't require much explaining - just work your way across the canvas one color at a time! The downside here is that the exposed areas might get less sticky over time. But on the plus side, filling in all of the blank spots is that much more satisfying than going row by row, for example.
"FARM PLOT" METHOD
Put yourself in the shoes of a farmer and divide up large blocks of the same color into little "plots" that you'll "harvest" on at a time! Are we stretching the metaphor too far yet? Keep each rectangle just wide enough that you can place 3 or 5 diamonds with the wide end of your Diamond Pen.
WHAT DOES EACH DIAMOND PAINTING KIT INCLUDE?
Each Diamond Painting Kit comes with everything you need to get started!
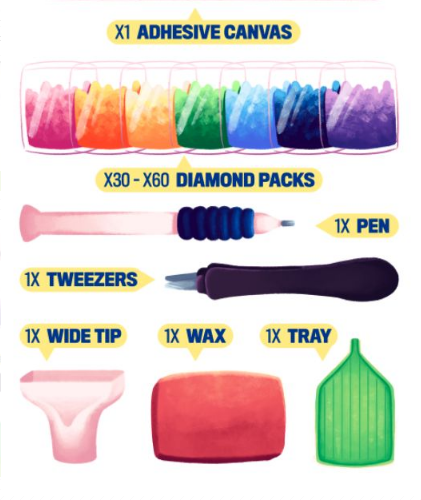
- Pre-printed canvas with design chart (with pre-applied adhesive)
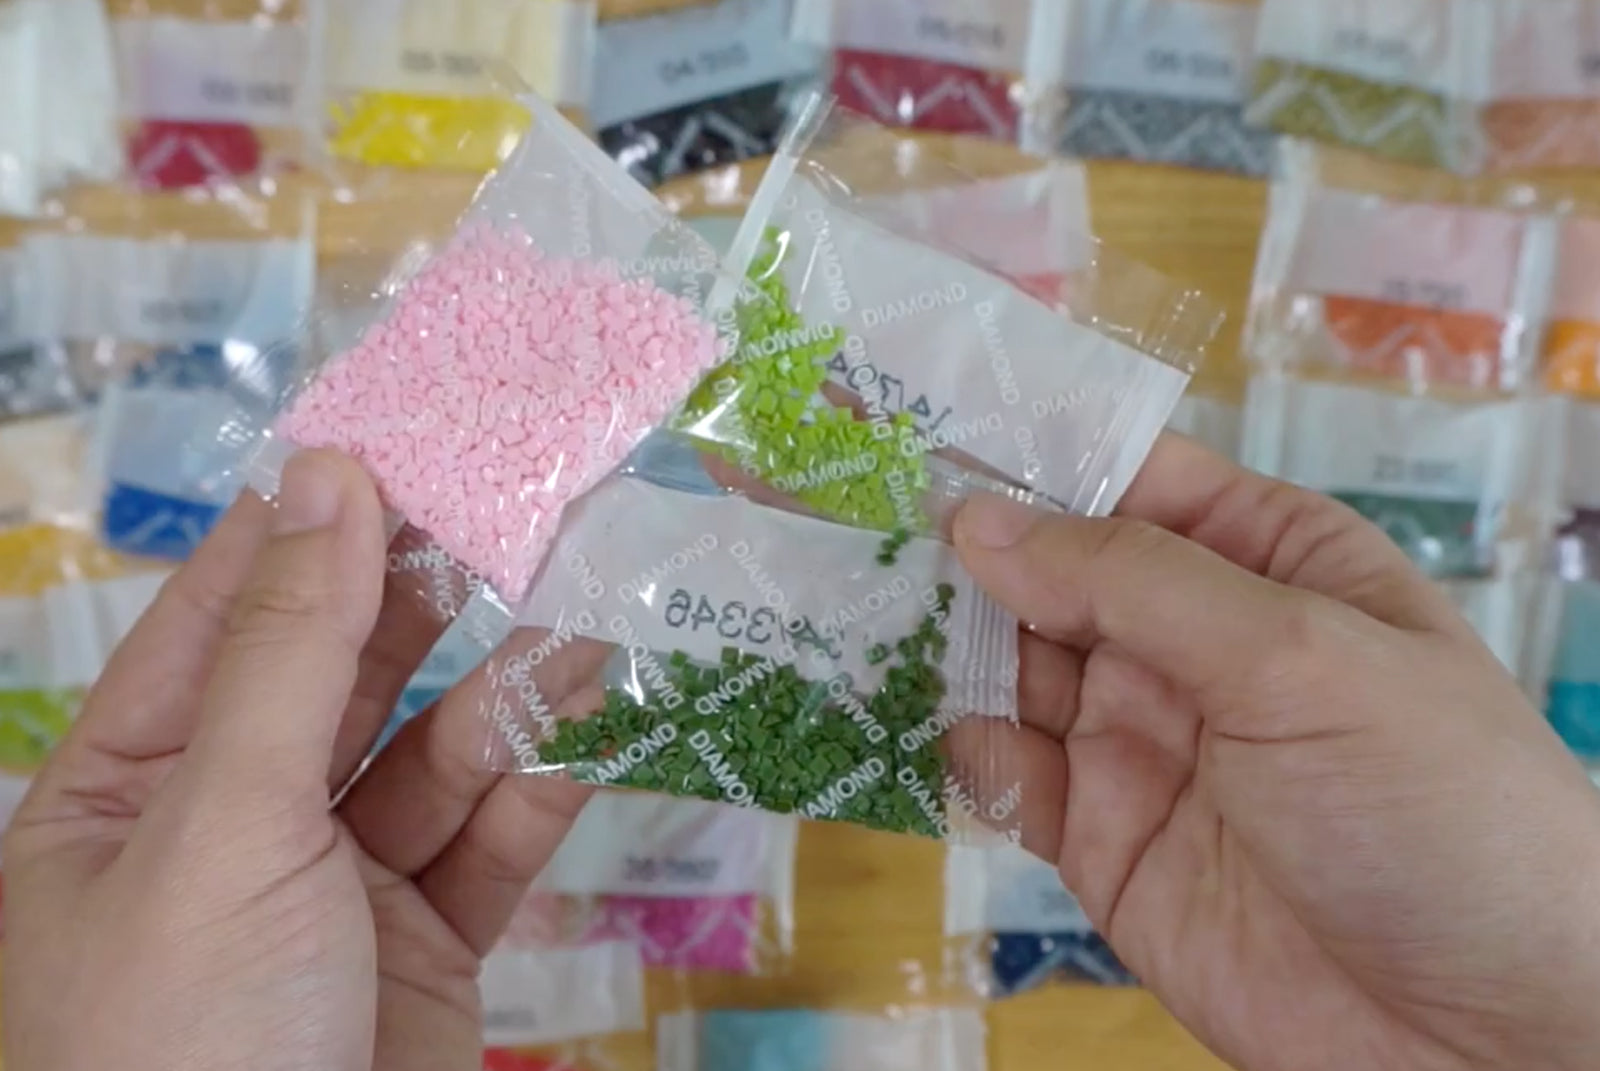
- Color diamonds delivered in separate bags (labeled)
- Diamond pen tool
- Pair of extra-sharp tweezers
- Wax pad (used to pick up diamonds)
When ordering kits, be sure to pay attention to 1) where the kit is coming from and 2) how it's packaged. If your kit is coming from overseas, you'll want to be sure it's packaged securely for transit.
At handdeals, we avoid common shipping problems by wrapping our canvases around foam noodles to avoid creases and plastic wrapping all canvases to avoid water damage.
DIAMOND PAINTING TIPS & TRICKS
REMOVE CANVAS CREASES AND IMPERFECTIONS BY APPLYING WEIGHT
If your canvas has creases, folds, or other imperfections in it, apply weight for an extended period of time. to flatten it out.

Option 1: Put The Canvas Under Your Mattress. Try using your bodyweight overnight to iron out any creases and wrinkles in the canvas.
Option 2: Put Heavy Books On The Canvas: The same principle applies here - simply apply weight in the form of heavy books for a day or two.
Option 3: Cut Out Creases With A Crafting Knife: If there are stubborn creases, simply lightly go over them with an X-Acto knife to release any air trapped between the canvas and its adhesive layer.
HOW TO DISPLAY YOUR FINISHED DIAMOND PAINTING
From professional framing to DIY foam board displays, the sky is the limit when it comes to displaying your finished Diamond painting. You'll want to select an option that's appropriate for your budget and time constraints. Here are a few of our favorites:
1. APPLY STRETCHER BARS TO YOUR CANVAS
For more of a DIY approach to mounting, grab yourself a set of Stretcher Bars. The instructions are super easy to follow and result in a beautiful display with some added depth.

2. MOUNT YOUR DIAMOND PAINTING TO A FOAM BOARD
This technique involves a bit of measuring and cutting. Head down to your local craft shop (or Amazon) and find yourself a foam board. To create a flat, borderless painting, use box cutters to cut the foam board down to the same size as your canvas (not including the canvas border).

3. USE MAGNETIC HANGER BARS
This method is very low effort and can be done in a matter of minutes. Just grab yourself a pair of Wooden Magnetic Hanger Bars cut to the exact size of your Diamond Painting and clamp them to the top!

WELCOME TO THE DIAMOND PAINTING FAMILY!
